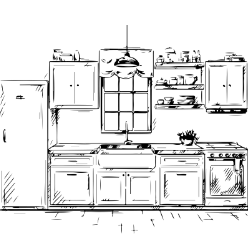


How To Build Window Seat
Well, you can make one yourself you know? And, what makes it even better, you can pop some storage in there too!
Doing so makes life easier, and it is actually easy to do. What’s the secret? Pre-built wall cabinets.

Do be aware it does take some level of skill, you’ll need more ability than just putting together flat-pack furniture, and it will take around 8 hours overall.
However, it only costs you a maximum of $400 to build!
So, let’s get cracking!
What Do You Need?
First up, let’s get a shopping list together for you! First, tools…
- Carpenter’s pencil.
- Cordless drill.
- Circular saw.
- Cordless electric nailer.
- Drill and driver bits.
- Electric miter saw.
- Hammer
- Prybar
- Paintbrush
- Tack cloth
- Tape measure
- Speed square
- Stud finder
- Sandpaper
What About Material?
- 1 Trim board, around 3 ½ “ x 96”
- 1 hardwood sheet (plywood) 3/4 “ thick and 4x8ft
- 1 3/4 “ quarter round at 96” long.
- 2 Wall cabinets 30” wide x 15” tall.
- 3 2x4 at 96” long
- 3” stainless steel nails.
- Wood screws #10 at ¾”, 1”, 2”, 3”
- Glue (carpenters), interior paint, washers, primer and caulk.
How To Do It?
The 20” x 15” wall cabinet is the main part, you could simply use one part for a narrow window, or double for a wide window.
At 15” it can also reach the height of most chairs, so is good for all window types.
So, let’s get started on how you do this.
Step 1 - Pick Your Window
First you want to choose the location. It should be 60” wide and the window base should be a minimum of 20” above the floor.
Do not place the seat over any heating or cooling units.
Step 2 - Taking Things Apart
Start by taking things apart. Remove the doors and shelves from your cabinet. But keep hinges on though and set all shelves, doors, and screws aside safely.
Then take away any baseboards using your pry bar and remove any other things like trim, stops, and any transitions that this installation in your home will render unnecessary.
Step 3 - Build Up The Base
Now you want to build up the base. Cut 2 of your 2x4s down to 60” and use the waste to cut off 5 boards at 12” each.
Place these between the 60” boards with one per end and one in the center, then the others between the ones you have already placed.
Nail all this together.

Step 4 - Attach The Base
Now you want to place your base to the window front, where it will go.
Ensure the behind of your frame is touching the wall. You will also need your stud finder to seek out three studs now.
Drill holes inside the frame base by each stud and attach your base to your wall with those 3” screws you got.
Step 5 - Attaching Cabinets & Toe-Kick
Now you need to use your drill and those 1” screws to attach your cabinets to your frame. These will need to be put together first with your 2” screws.
Once this is done, connect the cabinets to your base frame, give 9/16” forward to provide for an easy insertion of your trim underneath as an easy toe kicker.
Speaking of the toe kick, decrease your trim to 60” with your miter saw and place it over the base front. Then, attach it with around 6 or 7 finishing nails.
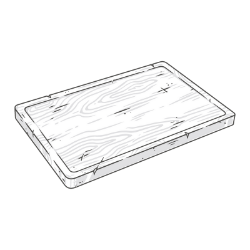
Step 6 - Cut Down To Size & Attach The Seat
Now it's time to install the seat! So, with your circular saw you need to cut out a plywood sheet to around 60” x 30.5”.
Then pop the seat on top of your cabinets with your factory-finished edge facing up. Remember the back of this should almost be against the wall, but not quite, give yourself a 1/8 “ gap for so.
Now, using your cordless drill, put your ¾” screws up through the top of these cabinets and into your seat.
Ensure that your screws go in the wood but won’t puncture the top, or this won’t be very nice to sit on.
You will probably want to pop in around 8 screws or so for this.
Step 7 - Attach Quarter Round
Now, with your saw, cut your ¼ round trim down to 60” in length and run some of your carpenters glue across the front of your new window seat. Then put this in place with your thin finishing nails.
Carefully clean up excess of your carpenters glue that squeezes out or makes a mess, you do not want this getting on anything you did not intend for it to end up on, even yourself.
Step 8 - Finishing Touches
Looks good already, doesn’t it? Well, it is time to make it extra pretty!
You want to gently sand down with a fine gritted sandpaper, especially in the join of your seat and your quarter round.
Do this to take away any tiny lips and sand of dried glue, getting caught on these is a pain you do not need.
Then apply a paintable caulk to any spaces you find, especially around the seat.
Finally, prime the surfaces and leave it to dry for a good 2 hours at minimum, then add some interior-graded paint twice over, attach your doors once the paint is dry and voilà!
You just made your very own window seat!
To Conclude
We have given you these measurements, but if you have a smaller area, then you could apply it to this as well, just make sure you do the math right.
Sure, it does take some time, and you need skills to do so, but who doesn’t want a gorgeous window seat! Especially for cozy winters!